HOW TO UNPACK BOOT IMAGE
To Unpack boot.img
1. Right Click on Cygwin and run as an administrator
2. Type cd kitchen
3. Type ./menu

4. Once Android Kitchen opens type "0" without ""

5. Now type 12

6. Now type "w" without "" (note : you first need to set up a working folder, steps to create working folder at the end of post)

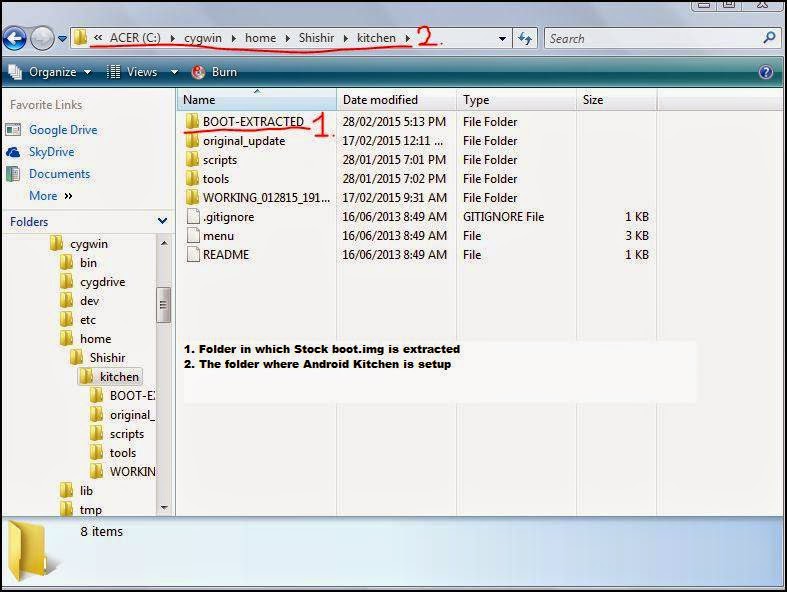
7. It will extract the stock boot.img in the folder where you setup Cygwin and Android Kitchen
8. Now type "a" without ""

9. A folder with the name bootimg_xxxxx_xxxx will be create copy and paste the Port boot.img in the folder

10. Press enter after placing the Port boot.img in the new bootimg_xxx_xxx folder

11. Now after the Port boot.img ha been unpacked open the kitchen folder

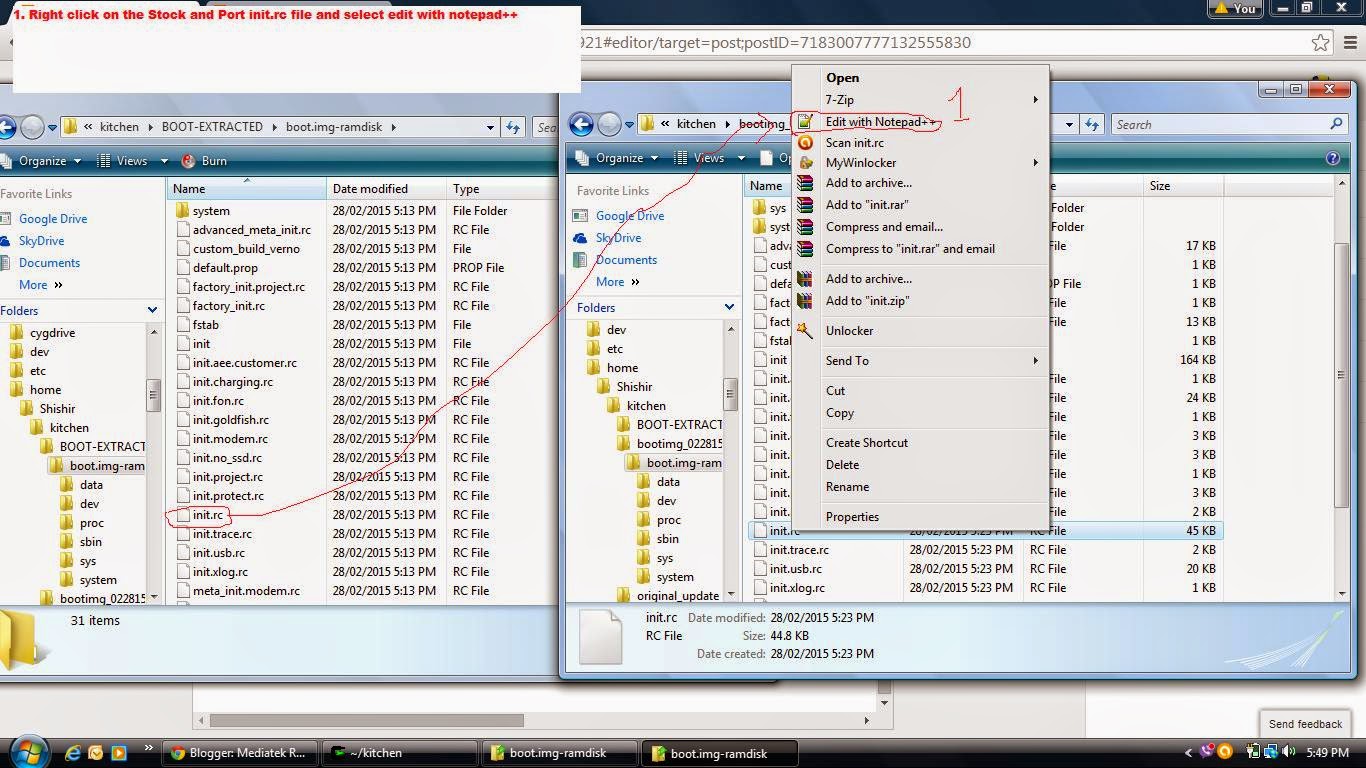
12. Now open BOOT-EXTRACTED and bootimg_xxxx_xxxx in two different windows

13. Open boot.img-ramdisk in both the Port and Stock folders and copy everything that is inside Port boot.img-ramdisk folder except for init.rc

14. Now delete all the folders in Stock boot.img-ramdisk

15. Now paste and replace all the files from Port boot.img-ramdisk folder in Stock boot.img-ramdisk folder

16. Now right click on the Stock and Port init.rc and select edit with notepad++
17. Now go to the export BOOTCLASSPATH line of Port init.rc and copy the entire line and replace it with the Stock export BOOTCLASSPATH (make sure they are in the correct category see image to understand)

18. Now save the Stock init.rc file and close notepad++
19. Now open cygwin and type "b" to repack the ported boot.img

20. After the boot.img is successfully repacked you can find the ported boot.img in the Working_xxxxfolder

To Unpack boot.img
1. Right Click on Cygwin and run as an administrator
2. Type cd kitchen
3. Type ./menu
4. Once Android Kitchen opens type "0" without ""
5. Now type 12
6. Now type "w" without "" (note : you first need to set up a working folder, steps to create working folder at the end of post)
7. It will extract the stock boot.img in the folder where you setup Cygwin and Android Kitchen
8. Now type "a" without ""
10. Press enter after placing the Port boot.img in the new bootimg_xxx_xxx folder
11. Now after the Port boot.img ha been unpacked open the kitchen folder
12. Now open BOOT-EXTRACTED and bootimg_xxxx_xxxx in two different windows
13. Open boot.img-ramdisk in both the Port and Stock folders and copy everything that is inside Port boot.img-ramdisk folder except for init.rc
14. Now delete all the folders in Stock boot.img-ramdisk
15. Now paste and replace all the files from Port boot.img-ramdisk folder in Stock boot.img-ramdisk folder
16. Now right click on the Stock and Port init.rc and select edit with notepad++
17. Now go to the export BOOTCLASSPATH line of Port init.rc and copy the entire line and replace it with the Stock export BOOTCLASSPATH (make sure they are in the correct category see image to understand)
18. Now save the Stock init.rc file and close notepad++
19. Now open cygwin and type "b" to repack the ported boot.img
20. After the boot.img is successfully repacked you can find the ported boot.img in the Working_xxxxfolder
DONE!!!